Funky Card Holder

1card holder Resized
33 card holder Resized
32 card holder Resized
40 card holder Resized

Today’s entry is a card holder loosely based on this one: http://schlosserdesigns.blogspot.co.uk/2009/02/tutorial-tuesday-business-card-holder.html

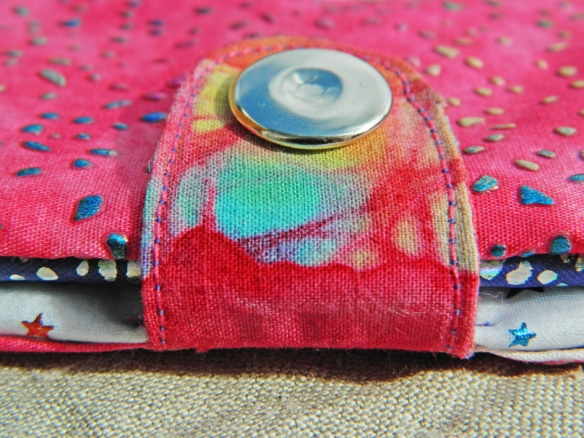
I knew I wanted to make one as soon as I saw it, but I wanted to give it the Snotty Dog twist, so taking purely the twin pocket idea, I set about making my own with that little added extra “something”.

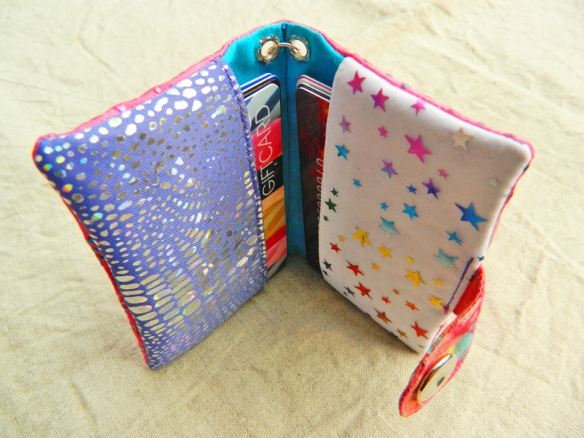
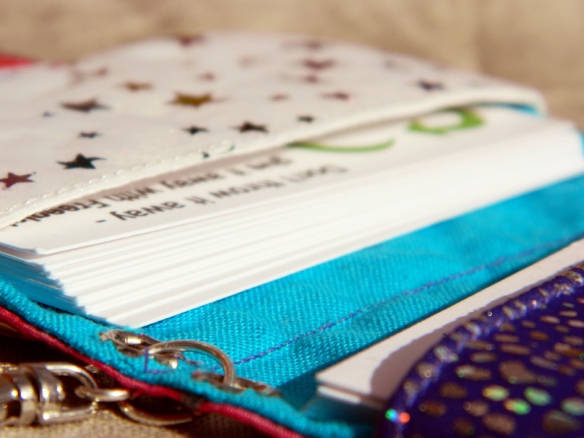
It is large enough to take store cards or even credit cards if you don’t have any business cards to fill it.

And the clip means you can attach it to the end of the zipper on an inside pocket of your bag so it doesn’t drift about in the bottom evading capture when you’re standing at the till, or trying to get your business card to someone who needs to dash off.

You will need:

A very small amount of fabric(s) of your choice, scraps even, or a fat quarter.

Coordinating thread(s)

2 small rivets. Even card making ones should be fine if that’s what you have.

Rivet setting tool (you usually get a basic one to use with a hammer in the pack)

1 snap fastener or press stud

1 small swivel clip

2 jump rings, one larger than the other to attach the clip. Or you could use a single smallish split ring- the type of thing you have your keys on.  (I made my jump rings as I have jewellery pliers and wire, and it only takes a minute.)

Instructions:

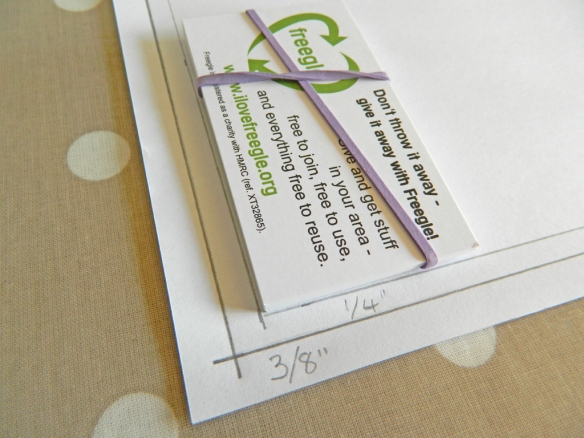
First I checked the measurements and it turns out that the cards I’m making this for are (roughly) 3.5 x 2 inches.

I then decided I needed 3/8” for seam allowance, and ¼” for “ease” so that the cards aren’t rammed inside, and you have enough room to get one out easily, even if you have a fair sized stack in there. Plus then another inch in between the cards where the fabric folds over. This will allow room for your clip later.
card holder Instructions
card holder Instructions 2R
This is what the pattern should look like (I forgot to write on 3 1/2″ up the side as I was making this all up as I went along and took the pic before I realised), just note that that is inside (extra to) the 1/4″ and 3/8″ measurements:card holder Instructions 3R

And this is the pattern for the pocket pieces – note that the measurements include all the seam allowance all the way around but only on the pocket pattern.  It would have been overly complicated to draw them in, and it’s easy enough to remember that ALL the seam allowances are 3/8″ on this project:card holder Instructions 4R

I went through my fabric stash and found these which I thought went together well (or clash so badly your eyes are now bleeding, it depends on your taste!). 😉 At this point I hadn’t fully made my mind up what the interior fabric would be, so I went looking in my stash and came up with a rather fetching turquoise that goes clashes particularly well. 😀card holder Instructions 5R

As the purple one has a significant one way stretch and was rather floppy, I stuck on some scrap interfacing from my stash. You may now be kicking yourself that you threw those bits away that you thought would be no use for anything. I am in no way encouraging hoarding – I am in fact helping, yes, “helping” you to bust your stash. Okay, I know this won’t bust your stash unless you make one for everyone you’ve ever known, loved, met, worked around and made eye contact with, but hey, it all helps.

You don’t need to have the interfacing all the way to the edge of the seam allowance, just enough to cover the rear of the main part that will be showing. As you can see, I wasn’t in any way precise:
card holder Instructions 6R

I did the same with the star fabric as it’s a chiffon/tuille see-through type fabric and thin and floppy as hell, so it needed a bit of propping up. Again there’s no need to add bulk to your seams – though the truth is, the scrap of interfacing just happened to be this wide, so I took advantage:
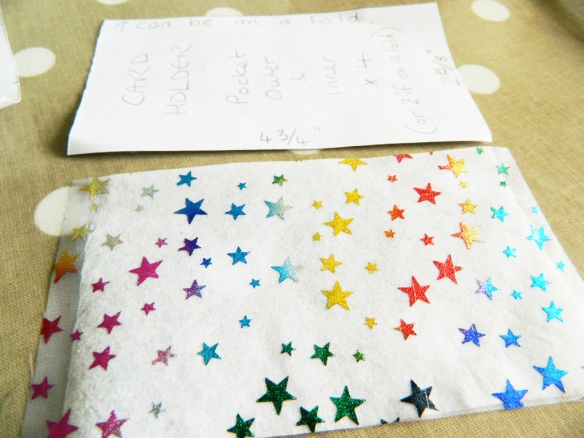
card holder Instructions 7R

Now cut out your outer and inner main fabric pieces:
card holder Instructions 9R

I used the selvedge here because as we are turning this inside out, I wanted an edge that was a bit more robust, and it’s a good way of making best use of fabric! Just be sure that the undyed/holes part is within the seam allowance. I had to trim about 5mm off, but it’s still sturdy without it:
card holder Instructions 10R

Also cut out two “lining” pieces from some plain scrap to use for the inside of the pockets. Here are all the pieces laid out:
card holder Instructions 11R

Okay, now take one of your “pocket outers” and one of your “pocket inners” in turn, and with right sides together, sew down one long side only. Remember all the seams are 3/8ths of an inch, and you don’t have to back stitch if you don’t want, as the ends will be enclosed in the next step.

Now – and remembering to use matching thread, unlike on my first attempt that I had to undo – turn them right sides out, and top stitch about 1/8th in from the edge you have just sewn, so you enclose the last row of sewing you did, and flatten what will be the top edge of your pockets. It will look neater if you sew it liner side up, and pull the liner over just a little more, so that it will be hidden when the holder is finished:
card holder Instructions 12R

Now you need to find either something you can draw around, that is roughly 1 ½” across, or use a compass, and draw yourself a “U” shape that is roughly 2 ½” long x 1 ½” wide out of either a contrasting fabric, as here, or the same as your outer fabric. Cut out two of these. (Pic A)

With those U-shapes right sides together use the edge as your guide for the 3/8” seam allowance, and sew around the U, leaving the straight edge open. Take your time or you’ll have a wonky tab. Trim with pinking shears if you have them, or just down to about 1/8 to ¼” if you don’t. (Pic B)

Turn the right way out, I used my bone folder, it was just the right size, and press if you need to to get a good edge. Don’t push on your seams too hard or you may bust through them. (Pic C)  Don’t ask me how I know this.

Top stitch in a matching (or contrasting) thread, no need to back stitch, you will be enclosing the end. (Pic D):
card holder Instructions 13-16

The next step is locating your press stud “back” on your outer fabric. It will be located at the opposite end to the one with the opening for turning the thing right sides out (so in my case it’s at the opposite end from the selvedge). And you want it to be central along the edge.

So fold under your seam allowance, and using a ruler to find the middle, and holding your “tab” that you just made slightly under the edge as if it were sewn on the other side of the holder, lower it down and (you have to guesstimate) put a pencil mark where you want it to go. Don’t worry if you only have a biro, it will be covered up by the metal stud. I put an arrow so you can see mine as it’s hard to make out with all the other dots. You don’t want to be pulling the tab hard around to get it to shut, so leave enough ease that it will just sit right. Basically, don’t put it too far in, and don’t put it too close to the edge. You will get to fine tune where your tab gets sewn later, so don’t worry too much whether it’s in the right place or not, just go with your gut:
card holder Instructions 17R

Make a hole where your pencil mark is just through the one (outer) layer of fabric. The stud (if you’re using this type) comes in four parts. When you have them in front of you you will see there are two parts to the bottom, and two for the top. Get the back of the bottom part, and put it through the hole:
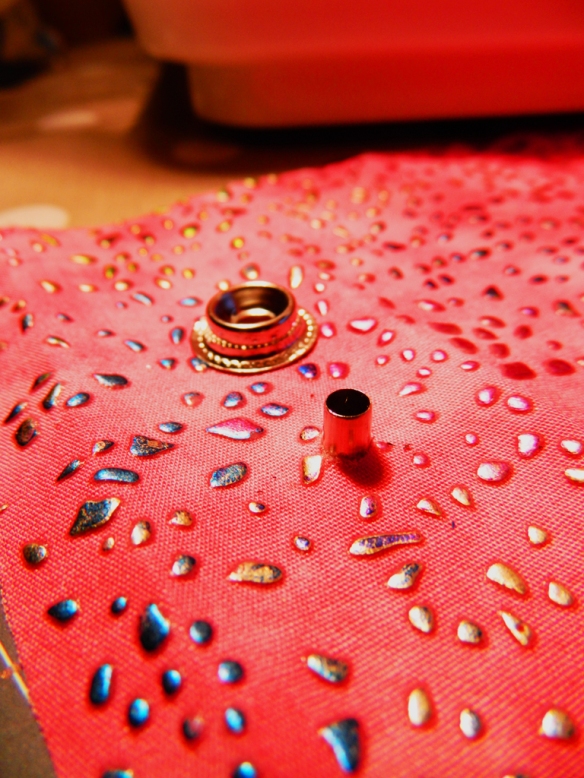
card holder Instructions 18R

Now put the front on, and crimp with your tool, or bash the crap out of your mini tool with a hammer, (the one that came in the pack.) The next bit is for those of you who think the show “You’ve Been Framed” is full of “instructional” videos –

Don’t do this on a glass table. I don’t want emails from people saying I made you smash up their furniture. And if you do do it on your best wooden table, put something underneath so you don’t damage your french polish. A chopping board would work, but get that okay’d with the chef of the house first.

Make sure you hold the tool in place firmly, and don’t do what I did, which was to lose grip and let the tool jump to one side, causing the snap part to bend, rendering it useless until you bend it back with pliers while swearing under your breath:
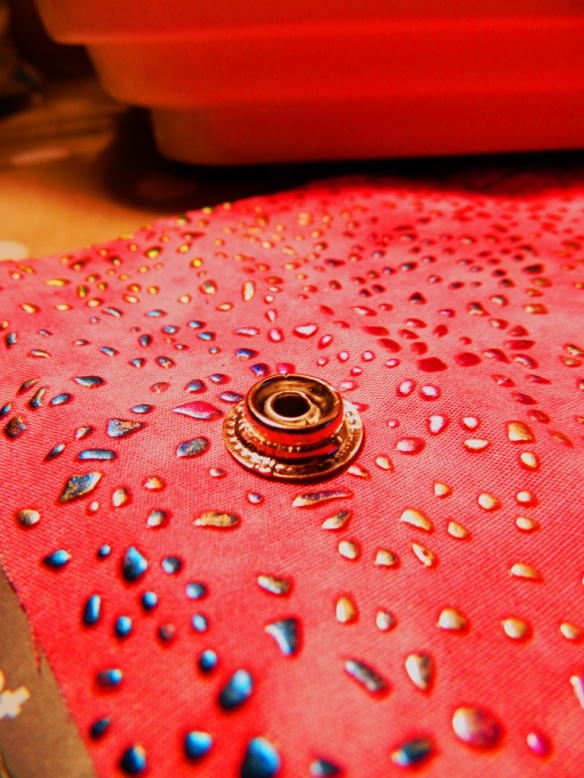
card holder Instructions 19R

Now you basically do the same type of thing with the tab, only this time, don’t do what I did and use a rivet setting tool to set the top of your stud – unless you want a dimple in it:
card holder Instructions 20-24

Fortunately I like dimples, though usually I prefer them on faces, and not in places where there should be a nice smooth chrome dome shape, but you live and learn and these days I just count myself lucky that I still have all my fingers, but that’s largely down to self-taught DIY and mechanics mixed with a neurological disorder that fries the old brain cells, gives you the shakes and 24/7 dizziness, rather than any built in stupidity. Honest. Some days it works better to aim for the nail, and sometimes to aim for the thumb, the fun lies in guessing what type of day it is.

Okay, now back to the larger pieces. Make sure you’ve marked on where your opening is. You want to start at the bottom mark, and sew (with 3/8” seam allowance) around to the top mark, leaving a reasonable sized gap to turn it the right way out:
card holder Instructions 25
Lay your pieces out in this order, ‘pocket & inner fabric right sides’ facing ‘outer right side’, and press stud on the opposite end to your opening:
card holder Instructions 25a

Snip off your corners at a greater angle than 180, as shown here, as it allows the seam allowance to sit flat when you turn it out:
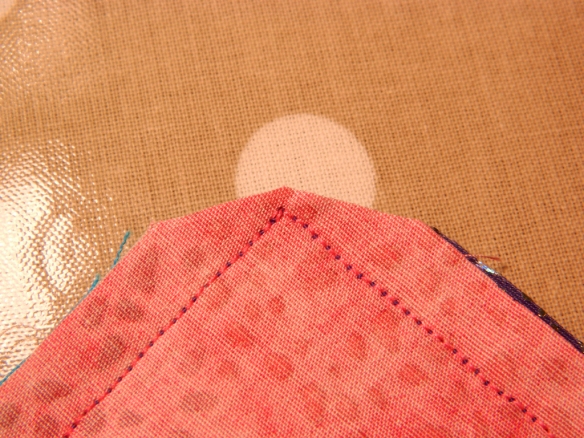
card holder Instructions 26

Pinking shear (or trim down) three sides to reduce bulk. Leave the opening end alone as it’s easier to sew later:
card holder Instructions 27

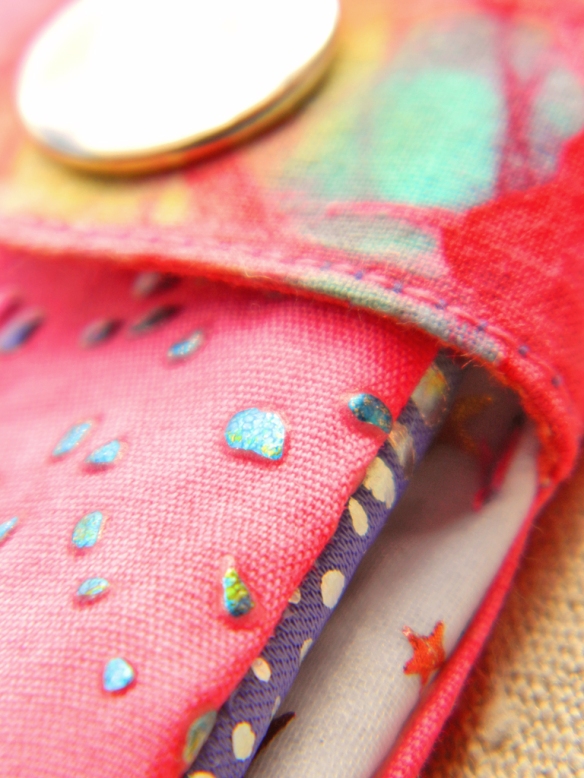
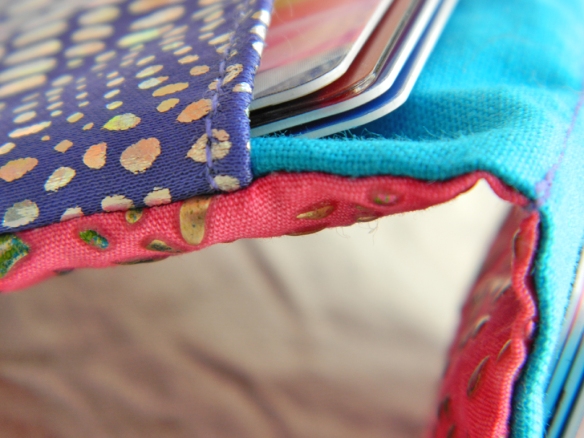
Turn the whole thing the right way out, making sure to put the pockets on the inside with the outside of them showing, like this:
card holder Instructions 28

Place your tab in the opening – making sure it’s the right way up – and sew the tab and the opening closed, as close to the edge as you can. You might want to remember to use the right coloured threads top and bottom, unlike me, the numpty who forgot. Not that it looks that bad, and it is on the inside after all:
card holder Instructions 29

Fold the whole thing down the middle, and mark the crease enough to sew a line along it. Then on one end, it doesn’t matter which, stamp out your “pilot” holes, and insert and set your rivets, with the top on the outer of the fabrics:
card holder Instructions 30

Now add the larger of the jump rings through the rivets, and attach the clip to this with the smaller one:
card holder Instructions 31

And you’re done!
36 card holder Resized (123)
37 card holder Resized (118)
34 card holder Resized (95)
39 card holder Resized (99)
38 card holder Resized (90)
35 card holder Resized

Do check out www.ilovefreegle.org if you are in the UK.

Creative Commons Licence
Funky Card Holder by Louise @ Snotty Dog is licensed under a Creative Commons Attribution-NonCommercial-ShareAlike 3.0 Unported License.

In other words, you can make these for yourself and your friends and family with my blessing, but you cannot use my work to sell them to make a profit, nor can you take my instructions and sell them as they are freely available here.  Do click through the link for more details, ta.

Door “anti-jammer” how-to.

door anti-jammer in use.  Snotty Dog.

I think they’re usually known as an anti-slammer, but in this instance I needed one to stop the catch from, erm, well, “catching”. Because for some unknown reason, (and I have taken the thing apart to try to find out the reason, without success), the kitchen door once closed, refuses to open. And it’s no fun being trapped in the kitchen.

And there’s only so long you can put up with makeshift anti-lock devices…..


I saw a picture of one of them on Pinterest, and it doesn’t take a rocket surgeon to work out how to make one.

You will need:

Tools –

  • Sewing machine
  • Pliers, preferably two pairs or you’ll struggle

“Ingredients” –

  • Covered elastic (even hair bands would work, though you would sew it in differently)
  • Sticky tape
  • Fabric off-cut (I’m using a bit of old velvet curtain)
  • Thread to match (I just used white as this is just about making it work, not making it look pretty)
  • 1.6mm diameter Garden wire (or any strong enough to hold the elastic together)

This is the wire and elastic I had on hand. If I didn’t have this wire I’m not sure what I would have used, although I imagine it would also be possible to sew the elastic together, it just wouldn’t be as strong. Strong staples might even work, or knotting it, although that’s quite bulky.

Wire & Elastic

Before you cut the elastic to length, measure it around the handles you’re going to be putting it on, and add a good inch for overlap when you join – and probably 3x more if you’re going to knot it – the good thing about knotting it is you can test it out before you cut it.

And before you do cut it, wrap sticky tape around it so that the fabric outer doesn’t fray or unravel:

Elastic & Wire

Use your pliers to wrap a length of wire around the ends of the elastic. Wrap it as tight as you can, and pull to make sure it won’t come undone. If it’s too loose squeeze the whole thing in the jaws to clamp it down.

You can see in the second picture (above) that one end of the tape came off, but at it happened after I’d wrapped the wire round, I wasn’t so worried.

Your fabric needs to only be about two inches wider than the width of your door (once hemmed). Put the elastic loop on top of the fabric, just to check it sticks out on either end. I sewed a hem on the sides of the length of fabric so they would be enclosed and not fray. There was already a hem on one short end from when it was curtains, and the other end doesn’t need a hem as it’s going to be enclosed.

Following the steps in the diagram, fold the elastic loop into the fabric. Now sew down one side enclosing the elastic down a long end. Start with the side of elastic that is smooth with no join in it. Now slide it around so that the “knot” is in that side, and sew along the other side, making a channel for the elastic on the other long side.

Fabric steps

When I had done this I sewed on top of the “hem” stitching making the hole that the elastic (on the knot side) was only big enough to allow the elastic to slide through, but too small for the knot to come out, just so it looks neat and tidy. But you do have to take care that the join doesn’t end up in the middle, or the wire will put dents in your woodwork!

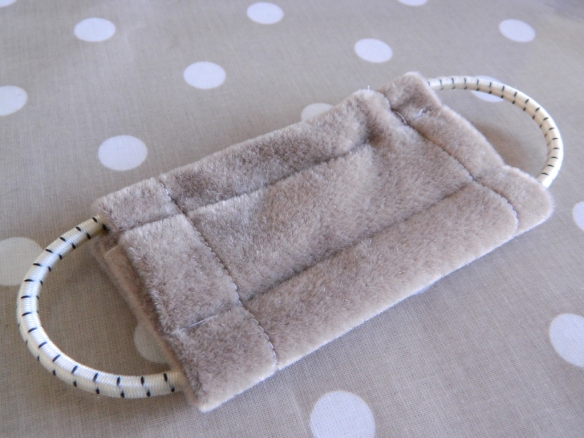
And this is what it looks like when it’s done:

Door anti-jammer

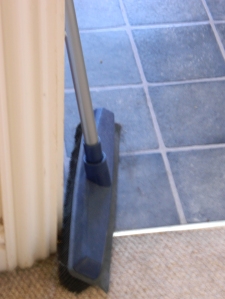
Here it is in use, jamming the door closed, but without locking someone in the kitchen:

Door anti-jammer

Success!

If you want to be notified of new blog entries, type your email address into the box or click “Follow” at the top right of the Snotty Dog home page.

Bottle cutting, and stuff…

Bottle cutting 1

Well I didn’t draw blood – which is a miracle, considering my lack of muscle control, and it’s still in one (technically “half”) piece, so I guess you could call my first attempt at cutting bottles a success…!

This is what my lack of muscle control got me the other day when I was using my glue gun – I got hot glue on several fingers and both thumbs, but this – my right index finger – came off worst.  I had to dunk it in cold aloe juice for an hour and a half to take the stinging out, but thanks to that it’s now gone down, and has been pain free ever since.

Blister from hot glue from a glue gun

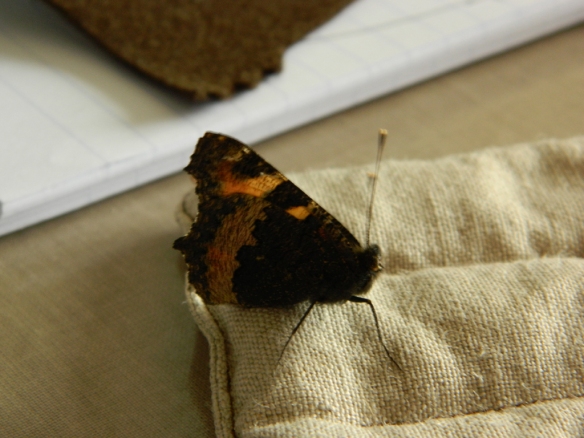
I was checking whether my compress had fully dried out, and this beastie popped out from behind the radiator.  Poor thing appeared to be shivering – that’s why some of it’s out of focus.

I cupped my hands around him and gently breathed warm air in to help him warm up, then he walked onto my hand, so I held it towards the door, and off out he flew!

Quivering butterfly

So, on with the bottle cutting!

All you need is:

  • A bottle that would otherwise go into the recycling.  I’m using a brandy bottle as it’s nice and wide at the bottom.
  • A glass cutter.  (The pen shaped tool with a little wheel on the end that you roll along glass or tiles),
  • Some hot water,
  • And some cold water.

I taped some straight strips of cereal box around the glass bottle, taping it all around the lower edge, leaving the upper “cut line” without tape.  This was enough of a guide to keep the cutter straight.

Then all you do is scrape the wheel around the bottle, hard enough to make a mark.  You can tell you’re doing it right from the noise.  It makes an awful noise as it cuts into the glass, like nails down a blackboard.  (Blackboard?  Ask your mum coz you’re making me feel old already)

And then once you’ve gone all the way around, you take it to the sink, and pour hot water over the line.  Then cold, then hot, then, well, until you hear a “clink” and the top and bottom part company.

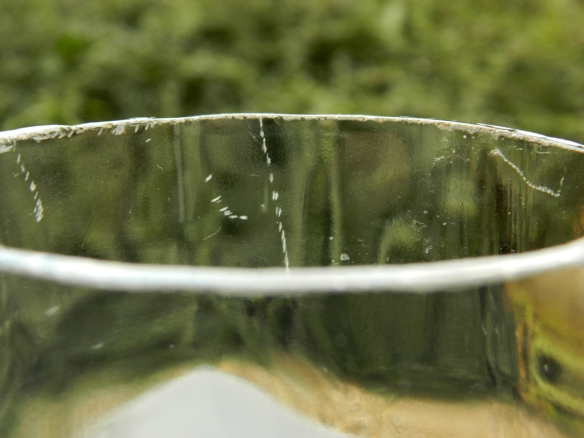
This is the top edge during grinding.  I used wet n dry “sand”paper for a bit (the black stuff), and the dremmel-alike a bit, and both seemed to work equally well, though the dremmel-alike of course does a lot more for a lot less effort.  Though I think there’s probably a better attachment for glass than I used.

And thanks to the wonders of refraction, my dog has an extra long neck…he’s not like that in real life, honest….

top edge of cut bottle

In this close up you can see where the dremmel-alike skittered (great word, don’t get to use it often enough!) across the surface, leaving marks:

Skittered marks from the dremmel-alike

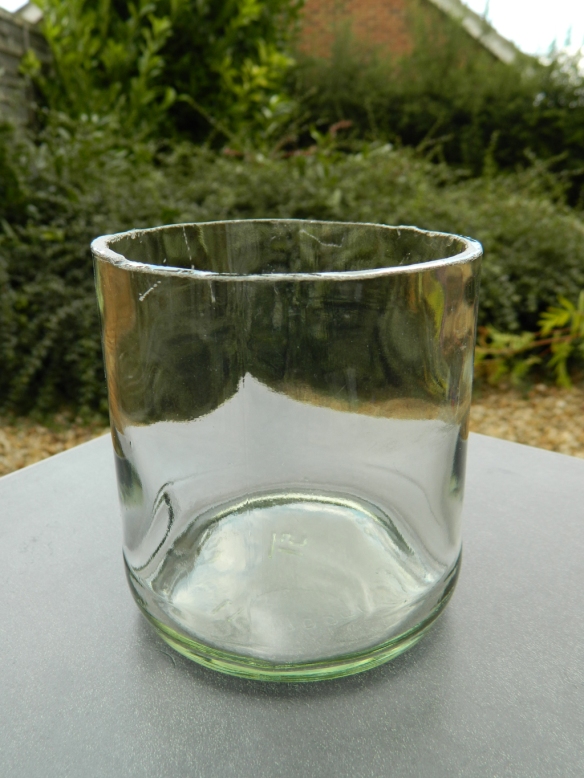
But as you can see here, they’re not *that* noticable really:

Finished cut and ground bottle

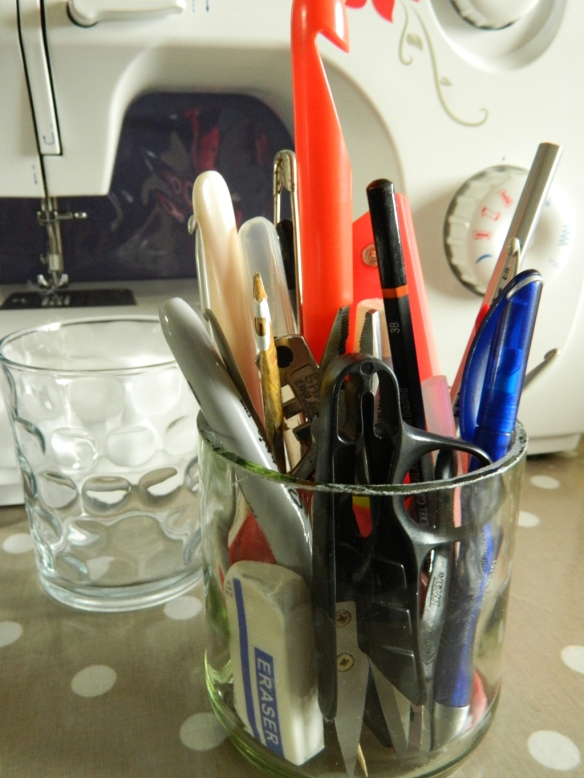
And especially not noticable when there are things in it!  I am only really doing this because I want my glass back – and you can just see the tip of the glass cutter I used to cut the bottle, hiding behind my snips:

Cut bottle with new contents replacing glass, behind.

So there you have it.  One cut bottle, no drama.  Next one I do I will be more careful grinding the line so that it’s a smoother finish and less grinding is needed.

Bottle cutting 1

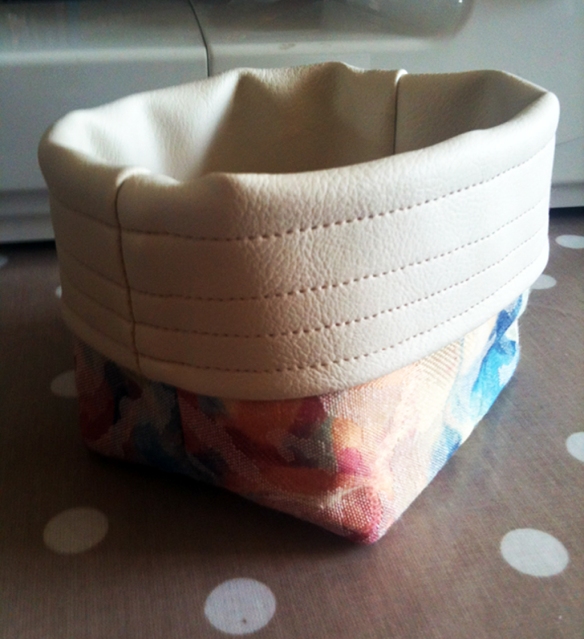
How to make a “Thread Catcher” or scraps bin.

I got the idea of this tutorial from one for a snack bag. I can’t remember how it said to make the pattern, but I wanted to make one myself in a way that didn’t rely on a lot of measurements and calculations. Instead it relies on your ability to put a crease in a sheet of paper, and pretty much everyone can manage that. Don’t be daunted – it’s all done in really easy steps, just follow the pictures one “crease” at a time.

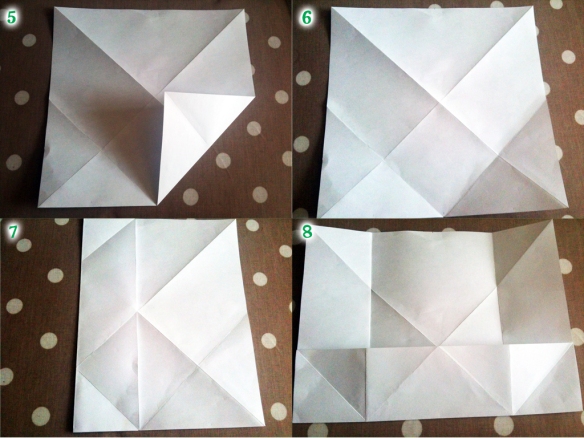
I’ve done this in a way that you can (hopefully) follow either just the writing, or just the pictures, or both, depending on how you best figure things out. (The number of each picture has a corresponding numbered line of text.)

1. All you need is a sheet of paper, and a ruler or something with a 1cm marking on it. This is just to mark a couple of lines of seam allowance where it’s easier to draw than fold. I’m using a sheet of A4 printer paper. You could reuse an old letter if you don’t have any plain, just turn it over to use the blank side.
2. Fold one corner down to the side, making sure you have a crisp sharp point to your left. Then use a straight edge and pencil to mark down the edge – where the pencil is pointing.
3. Unfold and cut down this line to create a square.
4. Fold the other diagonal now, and flatten the crease. Unfold.

5. Take the bottom left corner up to the cross in the centre.
6. Do the same on the bottom right corner. You now have a crease intersection in the centre bottom which lines up with the one in the middle of the sheet.
7. Using those two points now take the left hand side of the paper, and line it up so that you are folding a quarter of the sheet to the centre.
8. Now do the same thing with the right hand side, and then the bottom edge, bringing it up to the centre line.

9. Now take your ruler or set square, and from the corner creases, mark 1cm in, making a square inside the square creases.
10. Cut these out on the pencil lines.
11. You will be using this pattern to cut out two different types of fabric, two different sizes. This is to allow the inner one to fold over on the outside, creating a contrasting band around the top. So now fold the top edge down to the centre, just as you did with the other sides. This will be UNfolded for your INNER fabric, but folded down (making the pattern smaller) for your outer fabric.
12. Place your UNfolded pattern on your INNER fabric (I’m using leatherette). It’s easier to handle if you roughly cut it out just a little bit larger than the pattern, rather than wrangling a large piece of fabric.

13. Draw around your pattern. As this is leatherette and all the seams will be hidden, I’ve used a regular soft pencil. It’s a lot easier than pinning it and cutting around the pattern. I’m a firm believer in making life as easy as possible where you can.
14. You can see that there’s a little bit of a flaw in my piece here. It’s an imperfection in the knit of the fabric backing, but it doesn’t matter, you won’t even see it when it’s made, because it’s on the inside. This is a good way of using up your imperfect scraps rather than throwing them away!
15. Now folding down the top edge of your pattern, place it on your outer fabric and draw around it. You may want to pin the two layers together before you cut it out, just so they don’t slip about. I’m using a piece that has a fold at the bottom edge, just because it’ll make life a bit easier later on, but if you have two pieces, even non matching pieces, it doesn’t matter. You will be sewing that edge later anyway.
16. Now place the top edges “right side” together. If you struggle to remember this, just think of the fabric as having a front and a back. The front is the “nice” looking side – it doesn’t have to be the “official” front, it can be whichever side you like best and want to put on show – the two fronts are facing each other, much as two people might stand face to face. Sew down this side, just a straight line, remembering to press the “backwards” button on your machine once or twice to “lock” the stitches and stop it from coming undone.

17. This is how things ought to look when you unfold it.
18. Sew the other side in the same way to the other end (or other piece if you didn’t have a fold) of the outer fabric.
19. This is the shape it should be when you have all the right sides together. A big rectangle with a different fabric on each end, with the corners missing.
20. The right sides are together, and the thicker fabric naturally sits flatter. If yours doesn’t, just pick a direction for your seam allowance to go, and sew the next bit so that the seam goes under the foot with the raw edges facing you. Think of it in “cross section” a bit like this: —–<=== so you want the left side to go first, so that the seam allowance goes under the foot easily. If you try it the other way, you’re in for a bit of a fight.

21. You can see here that you need to sew all the long edges. When you do the long sides, flip it over and start with the INside fabric, so that your seam allowance is sewn in the same direction. It’s neater, but more than that, it’s a lot easier (see 20.)
22. Now pinch the un-sewn corners so that you’re putting the seam allowances together. It should flatten into a straight line
23. Do the same on the other corner of the outer fabric.
24. Now do the same on one corner of the inner fabric – don’t do both though!

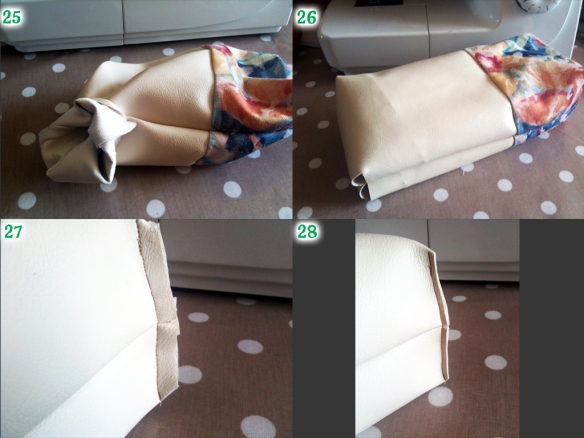
25. Turn the whole thing inside out through the remaining corner hole. Be gentle though, and take your time if you need to, you don’t want to rip it.
26. It ought to look a bit like this.
27. At this point pinch the hole the same way you did with the other three, and sew it closed just as before.
28. Now trim back the seam allowance to neaten it up.
If you’ve used fabric for the inside instead of leatherette, you can turn this in and do a ladder stitch, or turn it in and sew on top a couple of mm from the edge, so that it looks a bit like 28 but with the raw edges turned in. It will stop your edges from fraying a lot. Or you could put some fray check or glue on the raw edge to stop any threads coming off.

29. Now wriggle the inner fabric into the outer fabric, it will look a bit like this.
30. Pin the side seams of inner and outer fabrics together down the side, just to hold them in place for the top stitching. This is a LOT easier if you take off the removable bit of your sewing machine so you can stitch from the top and rotate it round, but don’t worry if you can’t do that, just take your time, or even turn it inside out and sew into the new inside so you rotate the piece above the foot instead. It’ll be a little tricker, but as long as you’ve pinned the sides, it shouldn’t be too bad.
Sew first around on top of the outer fabric, just a couple of mm from the seam with the inner fabric. Then go to the top edge and sew using the marks on your footplate as a guide, then twice more – I lined up the previous seam with the edge of the foot to keep them parallel.
31. This is how it should look.
32. You can leave it up, or fold the top edge down. Whichever you prefer. Here it now is with the scraps from making it! If you’re canny with your cutting you can make really efficient use of your fabric.

So there you have it. I do hope you can follow my tutorial. Do let me know in the comments if you find it useful.

Home made, chemical-free “reed diffuser”

I was quickly browsing Pinterest the other day – for a couple of hours, like you do – when I remembered I needed to look up how to make a reed diffuser that has no nasties in it – these days I have reactions to a lot of chemicals, even just catching a whiff of something can make me react badly (okay, to be completely blunt, walking past someone in the supermarket who appears to have bathed in their chosen perfume will actually cause my stomach to involuntarily propel some of its contents up into the back of my mouth. It’s not fun, and yes, I would like to slap people who inflict their perfumes on within a 3 mile radius.)

But that said, it is always nice to live in a place that smells nice, it’s just that when you have a sensitivity to chemicals, you have to go about things in a different way.

So that in mind, I threw some search terms into the box, and went hunting. I found this page: http://www.apartmenttherapy.com/homemade-reed-diffusers-147411 and decided that someone who says “wanted to avoid petroleum-based products” is thinking along the same lines as me, and I would use this as a starting point.

This is what mine looks like:

I used:

An old coconut oil bottle that I had cleaned out and removed the screw band that the metal tops leave behind
Glass paints and a stippling brush, because I wanted something a little more fancy than a clear glass bottle.
Some skewers with the points cut off,
Some essential oils (I’ll list them below)
Carrier oil – sweet almond
Gin – okay, I know it’s supposed to be vodka, but I don’t get out to the shops often, and it’s what I had on hand.

I had asked whether gin would be okay on the blog entry I found, but patience is not a virtue of mine when I am itching to get on with a new craft, especially one that has an immediate use, and so I just leapt in and tried it.

Once the paint was dry (Plaid glass paints, a little green, denim blue, gold and clear mixed together, three layers thereof to get the opacity I wanted), I got to mixing the smelly part.

Now here’s another thing about not getting out much – you have to make do with what you have – I had a rather strange assortment of oils. I found I had Cedarwood, Orange, Clove (yes, for toothache), Eucalyptus and Tea tree (yes, for bad skin, even at my age, so you won’t see me doing a how to on YouTube any time soon).

I noticed that after a while the clove oil left a nice almost flowery smell in the bathroom where the bottle lives, so I figure it can’t hurt to add some of that. And I know that when you mix two scents together, you can often get another where you can’t place either, because it’s a whole new smell altogether. Well that was the aim.

So I mixed:

24 drops Cedarwood
36 Orange
24 Clove
18 Eucalyptus
18 Tea Tree

I then topped it up with roughly 50ml of almond oil, and 80ml of the gin. My thinking is that the layer of oil will prevent the alcohol from evaporating too quickly.

Now I am not known for my luck, so wouldn’t you know it, today the local farmers have decided to muck spread all the fields around here, and the smell of dung is permeating the house, even with all the windows closed. So it may be a day or three before I can tell whether this is working as it should or not, or actually “pleasant” or not.

Nevertheless, I left the “reeds” (most likely bamboo, but it doesn’t say on the pack) in the one way up for a good hour, and then flipped them upside down. I did read that bamboo isn’t the most absorbent and won’t diffuse anywhere near as well as actual reed, but going down to the riverside to gather my own is something that will have to happen another day. Or another life – I would probably fall in. Or gather the “wrong type”.

So anyways, that’s my non-chemical reed diffuser made with stuff I had around the house. It doesn’t look terrible, it doesn’t smell incredibly bad, and I haven’t drawn blood making it, which is all too common an occurrence, so all in all, I would say a fairly successful craft experience. 🙂

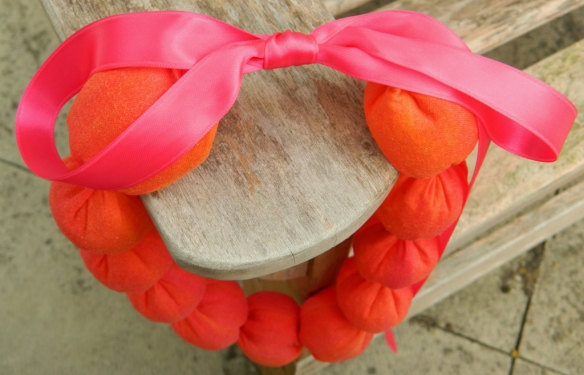
Make your own funky reusable cooling necklace.


This is a more feminine funky version of the “cooling bandanas” that you can soak and tie round your neck to keep cool on the hottest of days. Each bead is swollen with water retaining gel crystals.

To make your own, you will need:

  • Fabric, sewn into a tube
  • ribbon, to tie necklace closed
  • a sewing machine (you could sew it by hand, but it may take a while)
  • cotton yarn to tie between the “beads”
  • water retaining crystals

Secure one piece of ribbon inside one end pleating the fabric around it, and then sew closed.

The crystals – they swell up a LOT, so this half-filled half-teaspoon measure (1/4 of a teaspoon) is enough for one “bead”.


Mark intervals as long as the tube is wide (for round “beads”), insert a portion of crystals, and tie off with cotton yarn at each mark until you reach the length you want, and then finish off as you did at the start, pleating in a ribbon and top stitching.


What it looks like at the start of soaking…

…and what it looks like after half an hour or so of soaking.


And the finished item:

Creative Commons Licence
This work by Snotty Dog is licensed under a Creative Commons Attribution-NonCommercial-ShareAlike 3.0 Unported License.

Make your own reusable cold compress.

It’s always handy to have a cold compress to hand for when the bag of peas has done all it can, and you need something else to keep on the swelling, or to reduce a fever or take the heat out of a headache.  So make a reusable cold compress, and be prepared!

Reusable cold compress

You need:

  • A small piece of fabric of your choice.  A firm cotton or linen would work well.
  • Thread and a sewing machine (though you could hand stitch it if you’re so inclined.)
  • Water retaining crystals – the kind sold for use in your compost.

Take a rectangle of fabric, fold it in half right sides together, and sew leaving an opening to turn it the right way out.  Turn it inside out and sew lines from the edge to make a continuous channel (see pictures) so the crystals can move around the whole compress.

Put a small amount of the crystals inside (half a teaspoon will easily swell up enough to fill a 4×2 inch pocket – don’t underestimate this stuff, it really does swell up a LOT!), and top stitch around the edge, sewing the opening closed first.

Then all you need to do is soak it in a bowl of cold water for half an hour, and gently squeeze out the excess water, and use as required.  You will not believe how long this stays cold – and if it gets a little warm, turn it over, when that doesn’t work, run it under the cold tap a little to revitalise it.  If you need it extra cold, and I mean, extra cold, use water from the fridge, or put a couple of ice cubes in the tap water.

When you’re done with it, give it a rinse under the tap and rub gently to get rid of any skin cells or dirt, and leave it in a warm place to fully dry before storing it in a dry place.  This may take a while, you might want to put it in an airing cupboard, or the cupboard your hot water tank lives in to speed up the process a little, or place it near to a radiator.

Featured on:

(This link should work: http://frugallysustainable.com/2012/08/frugal-days-sustainable-ways-42/)

Creative Commons Licence
This work by snottydog is licensed under a Creative Commons Attribution-NonCommercial-ShareAlike 3.0 Unported License.