Black Garlic: Healthy & Delicious

Am reblogging this as I know so many people who are struggling with their health, and there are so many things that can help, it’s always worth trying something new, especially when it is food based and natural. xx

Getting Healthier Now

Like most fermented foods, aged black garlic is much higher in certain antioxidants than its raw counterpart. It’s one of the most studied foods, in recent years, due to its ability to lower cholesterol, and guard against a wide range of inflammatory diseases, including cancers of various kinds, and complications of diabetes. Studies also suggest a neuroprotective role, and a mechanism for blocking kidney damage. Historically, it was developed in Korea and used to treat a wide range of ailments, including arthritis.

How does it rate for fighting fungal and bacterial infection? According to this article, black garlic may actually aid in absorption of allicin, the antimicrobial compound found in both black garlic and crushed raw garlic, via  a compound called S-allylcysteine. Fellow health-nerds can read about the incredible details here. Given that synergy between S-allylcysteine and allicin, i often take black…

View original post 648 more words

Amazing home made dishwasher tabs!

I haven’t blogged in a while – the last post was the one that set me off on my journey doing craft fairs, and I just didn’t have enough energy to do that as well as blog.  Since then I decided to sell more online as a more productive use of my time, and so I’m back with the first in a backlog of entries.  I have a few more home made chemical free replacements, some snacks, and odd bits and bobs to come.  Keep popping back, I will add them over the next few weeks.

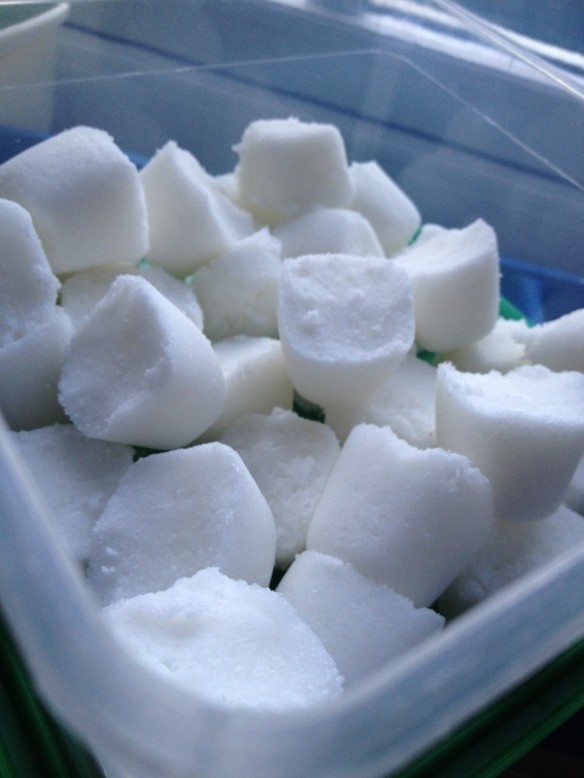
My latest endeavour is home made dishwasher tablets.  I’d seen these online and thought I would have a go at my own recipe as I knew I didn’t have enough of some ingredients for any of the recipes to follow them exactly, so I’ve adapted it to what I had.  I really want to keep down the amount of chemicals I use in the home, and I am happy to use all of these in this form.  At least I know what’s in them, unlike the store bought ones – which I also find always seem to leave a residue.  These ones don’t, they just leave sparkling dishes!

TabTub1

You will need these ingredients:

1/2 cup citric acid (“East End” brand do it)
1/2 cup salt – table salt is okay
1/2 cup borax (eBay or online – like hen’s teeth in European shops since they brought out new legislation for it – the last pack I got was from the Chinese Wholesale Supermarket)
1 cup bicarbonate of soda (cheaper in bulk online – called “baking soda” in the US)
1 cup soda crystals (proper name “sodium carbonate”, “soda ash” or “soda crystals”, I get this one: http://www.wellcultivated.co.uk/images/product/DP-Soda-Crystals-1kg-1a.jpg)
A splash of orange extract – I used the stuff for cooking with from the supermarket.  I figure it’s a food item, and that’s what goes in there stuck to plates, so why not?!

You will need these items:

A mixing bowl of some kind
A spoon or spatula to mix with (you might want to use one you won’t use with food, although silicone washes up just fine)
An ice cube tray.  I used a silicone one with a separate solid base
A silicone pastry brush, although this isn’t essential
A container to put the finished tablets (or powder) in

Directions:

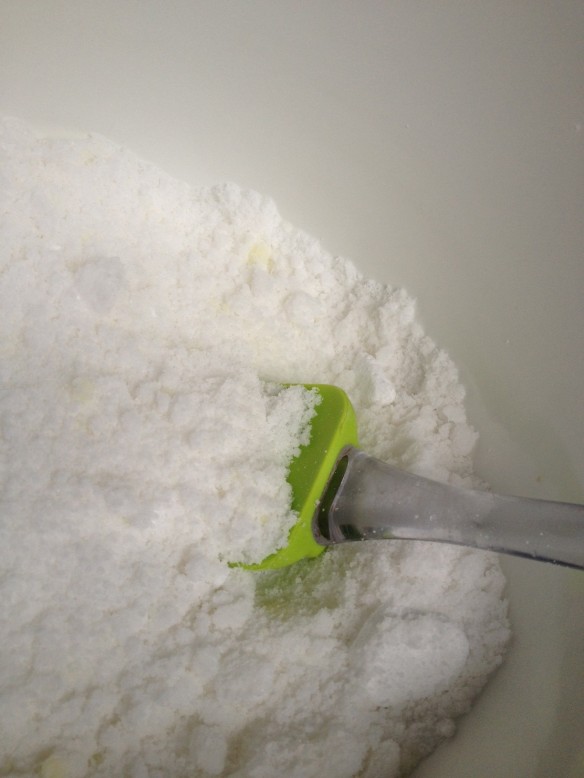
Place all the ingredients in a mixing bowl and mix well.  At this point you can just decant it all into a tub and put a scoop full in with every dishwasher load.  But if you want the convenience of grabbing a tab, read on….

InBowl2

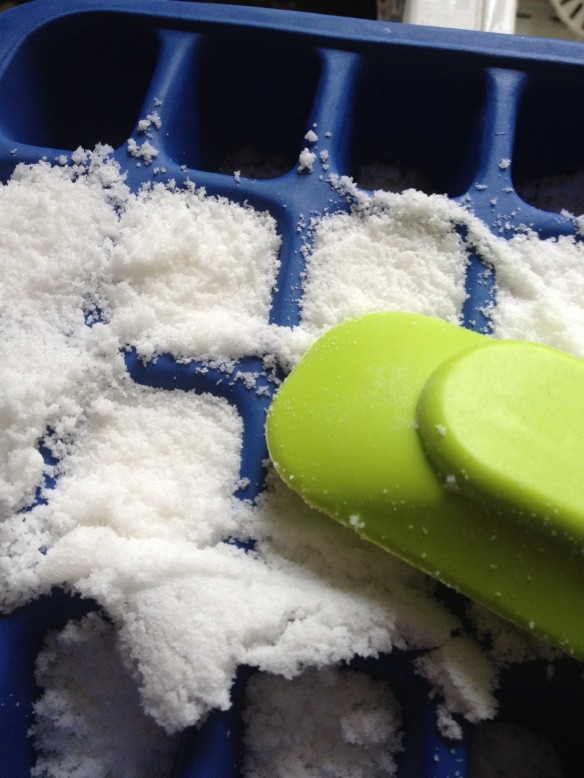
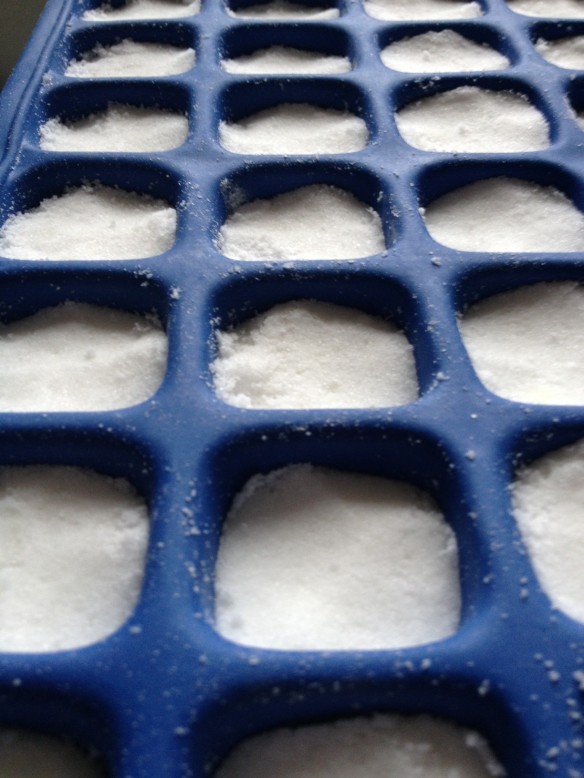
Tip into an ice cube tray, silicone if you have one:

IceCubeTray3

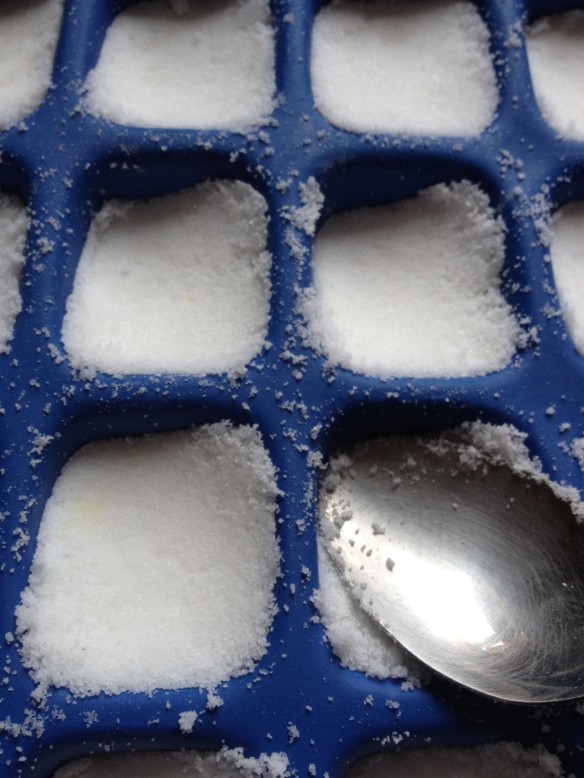
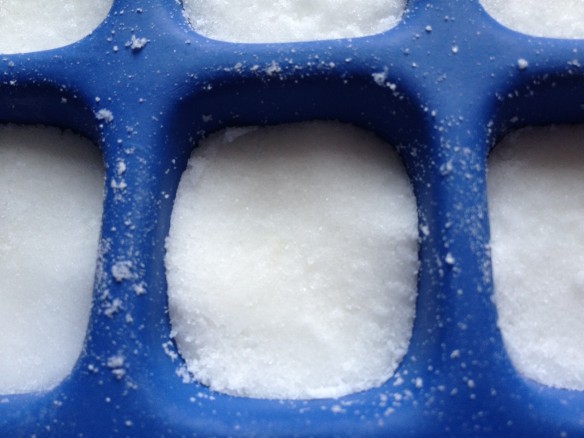
Tamp down firmly with a teaspoon or whatever fits:

IceCubeTray4

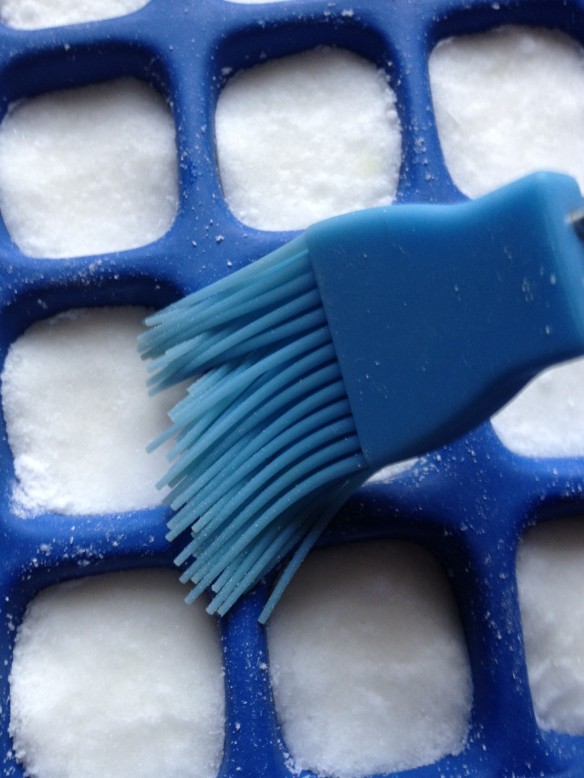
Use a pastry brush (if you’re so inclined) to get rid of stray bits:

IceCubeTray9

Then use a dropper or a straw to drop a few drops of filtered water on each one. I did seven ish:

IceCubeTray8

Leave to dry/set in a warm place for a few hours, then pop out of the mould and place in an airtight container.  I made a sort of tent around it and the radiator to keep the heat in as it’s winter here, and the heat escapes easily.

If you’re used to making bath bombs, you might have a better way of setting these up, feel free to let us know in the comments below, and I will try it with the next batch.

Use one per wash and be amazed at how well they clean compared to bought products!

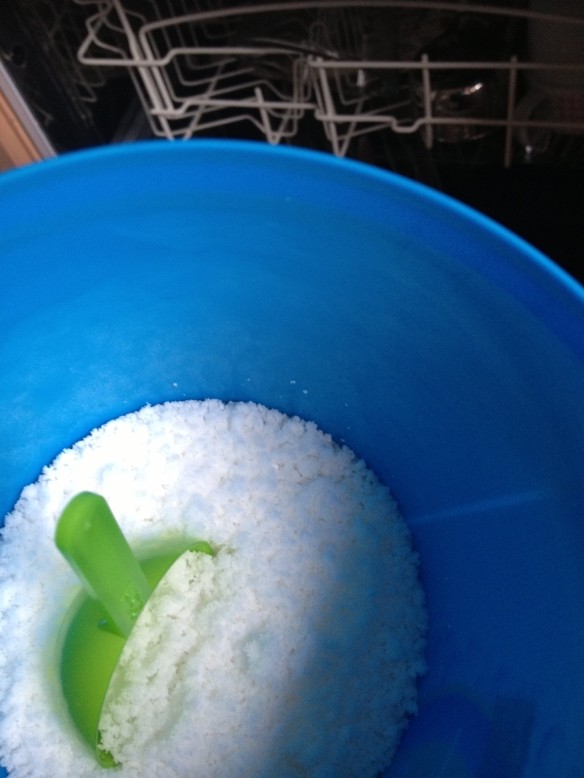
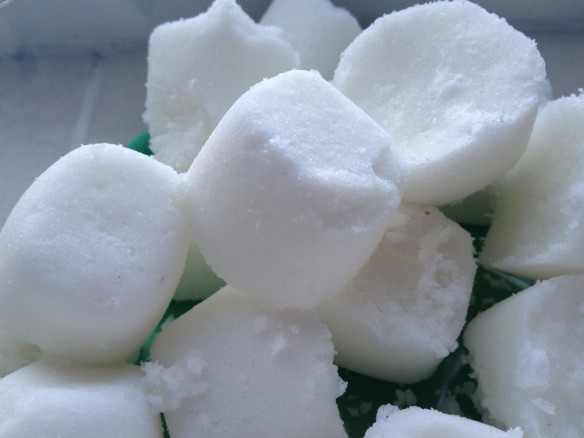
The tray holds 32 and there was enough powder left over to make that up to anywhere from 36-40. But I just put the left over powder in an old Oxy (laundry additive) tub so I can just use the scoop that came with it:

LeftoversInOxyTub1

I’d guesstimate the cost at maybe £2.50-3.00 for somewhere around 40 washes. But that’s guessing how much “a cup” of stuff costs. I will be able to be more accurate next time as I’ll keep hold of receipts and weigh what I use.  I think I used maybe 100g to get a half cup of the borax and citric acid, just to give you a rough idea, which cost me.  The washing soda crystals are £1 for a 1kg bag, and you maybe use 200g for this.

Finish powerball tabs are £12 for 39. Fairy clean and fresh are £6 for 20. Tescos own are £4 for 28. Ecover £4.70 for 25. So it comes out a good amount cheaper, which is nice – and they work better, which is amazing, and they’re “nasty” chemical free, which is awesome!

IceCubeTray5

If I was going to make any amendment to the recipe, I might add some of the baking additive, cream of tartar (essentially “potassium”).  I have read lately about its amazing cleaning powers on slow cooker stoneware, pans, glass casserole dishes and so on, where the residue just refuses to lift off.  Just a sprinkle and water to cover, leave for a while, and when you come back, it will swipe off easily with a scourer.  So I might try adding some of that to a portion of the next batch, see how it goes.

If you try this recipe, do let me know how you get on in the comments?

TabTub3


Getting ready for the craft fair…

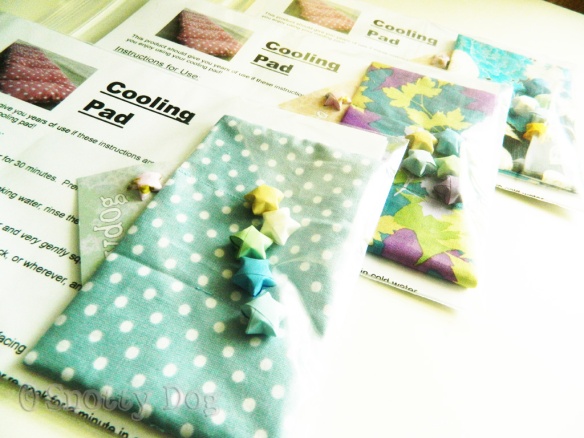
cooling pads in packaging
I decided a couple of weeks ago that I would take the bull by the horns, and have a go at selling what I make, with the hopes that it will take off, and give me an income, and something positive to do when I am well enough to do it.  So I booked a table at a local craft fair.  Just the one, just to see how it goes, if I sell anything, and more importantly, see if my body will cope with it before committing to another one.

But that’s the good thing about doing craft fairs – you can space them out as wide apart as you need to!  I have to admit, I am still nervous as it’s been many years since I did a stall, and back then I was pretty much 100% fit and healthy.

So this week I have been packaging up the new stuff I have made, like the cooling pads, above, and sorting out props and business cards and wotnot.

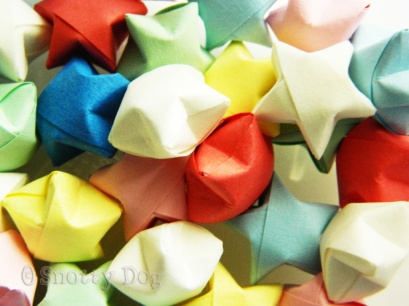
One of the more relaxing things has been making these origami paper stars while I watch tv:


origami stars

They’re just something I came up with the other day to scatter on the stall to make it look a bit more interesting, and add into the packs to add another dimension and hopefully make people feel they are getting a well made (because they are) cared about (yep, that too), product, that will make them feel better (product testers so far have been positive – thank you testers!)

So if you are in the March (Cambridgeshire) area on Saturday the 1st of June, and you have a bit of spare time, come and have a look around the stalls at the Fen Fair in the Scout Hut next to Sainsbury’s, just behind the main shopping street.  There are several wares on sale, hand made soaps, watercolour paintings, hand made cards, jewellery (soutache and otherwise), and my new reusable cooling products!

Hope to see you there, but if you can’t make it, just keep an eye on my website: snotty-dog.com – it’s not finished just yet, but it will be soon, all being well.

Fighting with photoshop

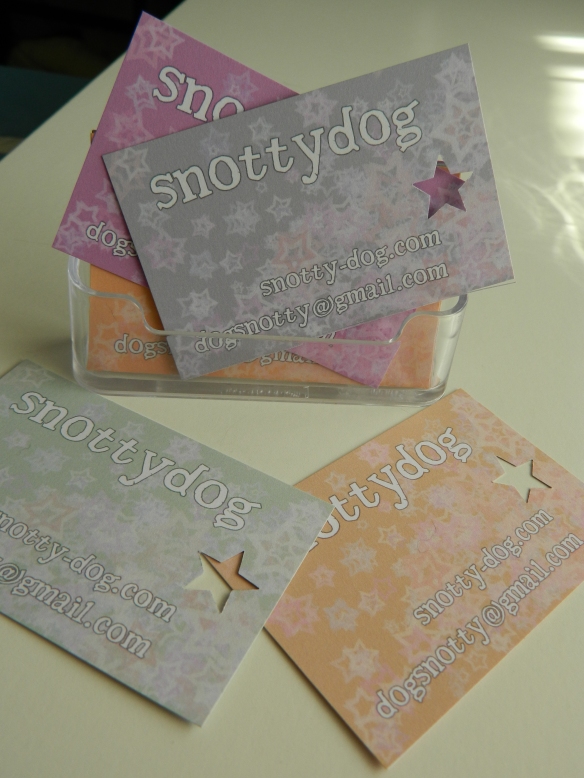
snottydog business cards
I spent hours the other day looking for a suitable template for business cards.  One that had crop marks or bleed marks, or just the right layout, and it needed to be A4 (for home printing), and none of them were what I was looking for.  It was driving me insane – considering all the free stuff available on the internet, I would have thought I would have been able to find what I was after, but no.

So, I did it all from scratch.  You can see the results of my labours above.  Ironically that wasn’t the hard part!  The hard part was laying out the spaces and the crop marks and rectangles to show where the cards will be.

So for those who use photoshop and who want to do some business cards, I’ve put the background layout on my website for you to download for free.  Just remember to turn the “eye” off on the grey rectangle layer before you print so it doesn’t show, and leave it on for the crop marks so you can see where to cut them.

Find it on my new website: snotty-dog.com

snottydog business cards

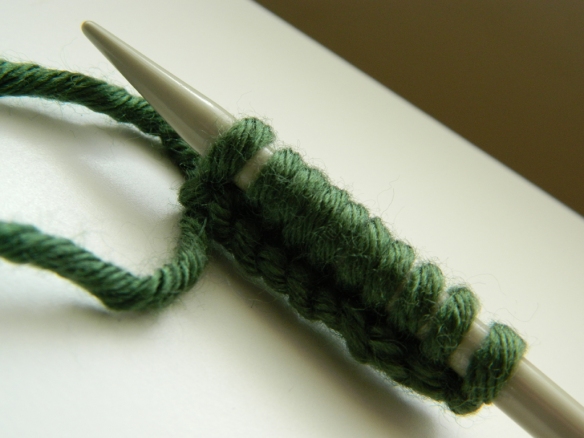
Casting on, the “thumb cross” method.

Video

Casting on (5)

Hiya,

Just a quick one for today.  I went looking on YouTube for cast on methods, to see if there was an easier way than I was doing it.  And they seemed a bit more complex, to be fair.

So then I went looking to see if anyone was doing it the same way I was, and I couldn’t find one.  I figured I would do a video to show my technique just in case it wasn’t out there at all, and to show a different way that some people might find easier.

It’s just a simple single needle technique where, having put a slip knot on the needle, you loop the ball end of the yarn around your left thumb, and yarn over with the tail end, and bring the tip of the needle through the gap in the loops.  It makes way more sense to watch it, honest!

I can’t embed video here, so here’s the link: https://www.youtube.com/watch?v=dAQil-Laarc

If you do it this way too, let me know in the comments.  It would be nice to know I’m not alone!

Eco friendly, MCS* friendly (& cheap!) washing “tabs”.

(*Multiple Chemical Sensitivity)

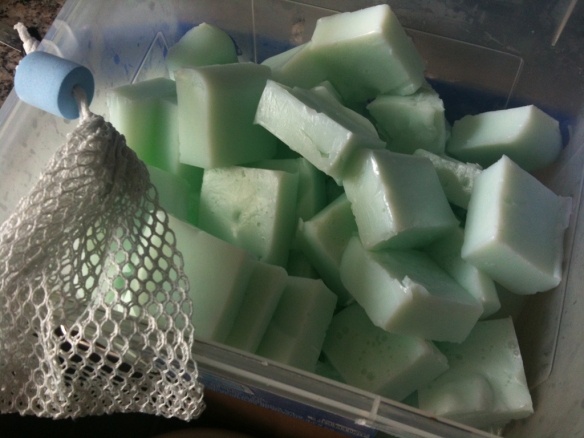
washing tabs


You will need:

Two or three bars of “vegetable oil based” soap – I used Palmolive olive oil soap, £1 for a pack of three, or thereabouts
Essential oils if you have a scent you want, but not essential as the soap will give a delicate scent.
Washing Soda Crystals – about a third of a 1kg bag (about £1 per bag)
A good sized (three pint or more) pan
1.5 pint jug
metal spoon, (or a wooden one specifically for this job)
A grater
A flexible plastic tub or a silicone baking pan
Storage container

Get your pan, and a silicone or metal spoon – if you use a wooden one, don’t use it for food again afterwards, as it will leech out soap and ruin your food!

Grate all your soap. Put a pint and a half of boiling water (from the kettle into the pan to save time and electricity), and put it on high enough a heat to keep it very hot, but don’t boil it.

Add a little of the grated soap at a time, sprinkle it on the top of the water so it doesn’t clump back up again, and gently stir it in. Do this until all your soap is dissolved into the water. This may take a little while. You can now turn off the heat under your pan.

Get yourself a jug, and put the soda crystals in, and make it up to a pint and a half – stir well. It likely won’t all dissolve just yet, but give it a good stir and pour it into your hot soap “soup”.

It should be a little thicker now than it was. Add your essential oils now if you are using them, and mix well.

While it’s still hot, pour or ladle out a layer into your baking pan, about half an inch thick. You don’t have to be exact. If it’s winter, you can place this outside or on a windowsill to cool quickly. When it’s set – you can test this by tipping the pan or pushing up the bottom – use a plastic knife to cut it into rectangles about the size of a dishwasher tab, no bigger. Or if you don’t have a plastic knife you can tip the whole thing out onto a chopping board and use a normal knife – just don’t use a normal knife on your silicone bakeware!

Just repeat this process until you have “set” and chopped up all your mix into chunks.

Stick these in a container or old ice cream tub, and use one of those little drawstring string bags, so for each load, put one or two chunks in, depending on the level of dirt on your washing. You don’t need to use fabric softener either, your clothing will come out soft without it.

I have been using these for months now. Give them a go – your health and your planet will thank you!

Hair Clip Revamp – easy, cheap & eco friendly!

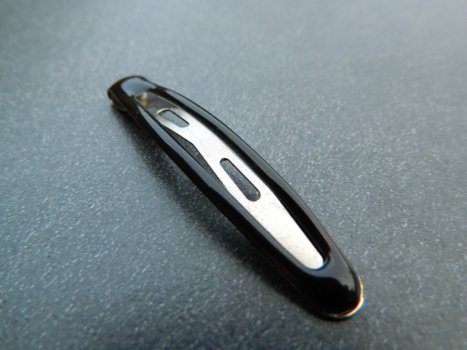
Hair clip R (3)

I was putting one of these in one day when part of the colour layer just fell off:

Hair clip R (1)

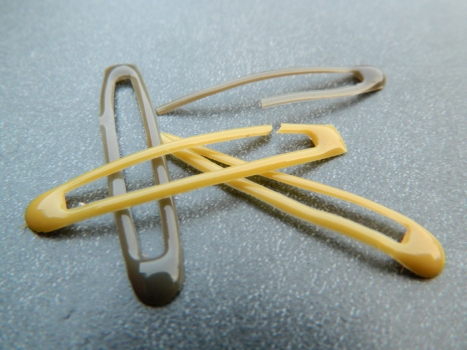
I figured that if it could “fall” off, it could also “peel” off, and so I could reuse the clips, and put another colour on them.

This was good news since I had some in a really icky yellow colour that I never wore, so I set about peeling the colour off the other matching one, and the two yellow ones, just to try it out.

Hair clip R (2)

I figured the best thing to try first to add colour would be nail varnish. With it being acrylic, and having remover to hand if it all went a bit wrong.

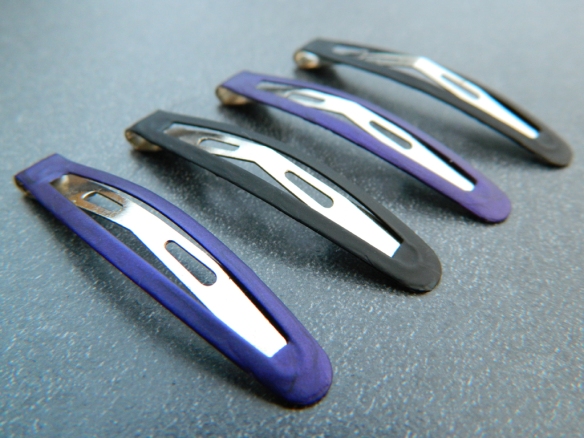
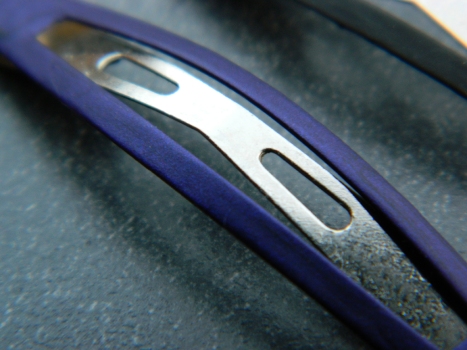
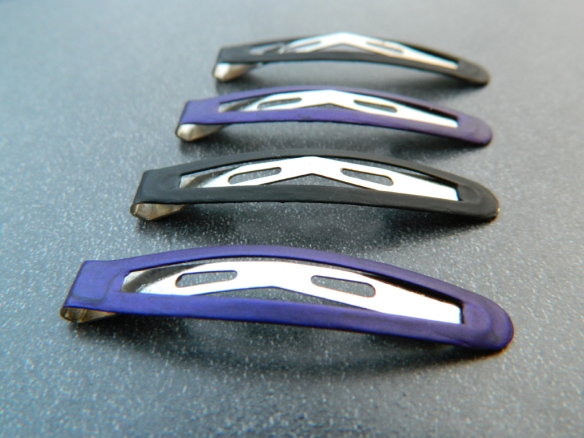
I had some matt finish in black and dark purple, and having dark hair, and not wanting them to stand out too much, I figured they would work well.

All I did was clip them onto a magazine, and paint the varnish on. I had to do a couple of layers to get it to the thickness I wanted. I have a feeling had I used gloss it would have been a lot thicker.

There’s no reason why you couldn’t just buy the plain ones to do this, rather than peeling the colour off. Or paint over the top of it, even.

Hair clip R (5)

The great thing about this is that you can paint your clips to match your nails or your outfit or your jewellery, or whatever you like and can get the colour for!

It’s so cheap you could even argue that if you already have everything it’s even practically free! Especially if you use one of those varnishes that’s past its best, or there’s too little left to do a full set of nails. It’s also eco friendly since you’re saving them from being thrown away. It’s quick – you can paint them in minutes, and then you only have to wait as long as the varnish takes to dry.

Hair clip R (4)


And there’s no reason why you couldn’t embellish them with flat-backed gems or paint them with stripes or spots or whatever too.

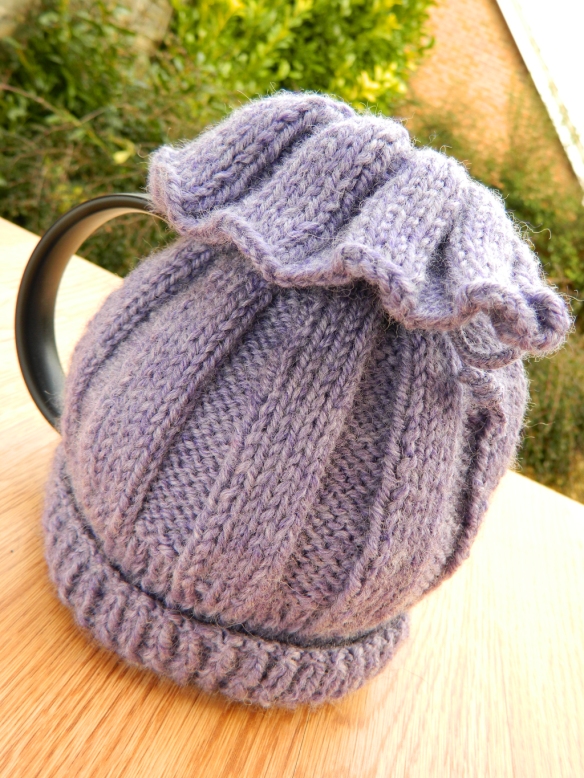
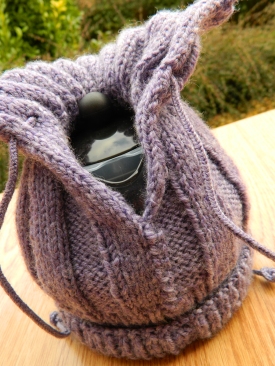
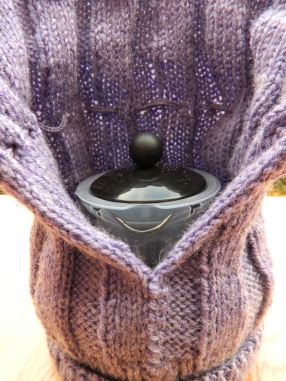
Knitted tea cozy for Bodum teapot.

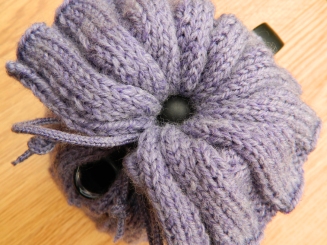
Purple poppy seed head tea cozy.

Purple poppy seed head tea cozy.


I’ve never made a tea cozy before. Mostly because I haven’t really used a teapot much, mostly because I am usually alone, and can’t justify making that amount of tea for myself. My large teapot is still in a box somewhere. This one is a far more manageable size, about two mugs worth, and so given my recent increase in herbal and sencha tea I figured it would be handy to have one to keep it hotter for longer. And you may have gathered, I don’t buy things if I can make them instead.

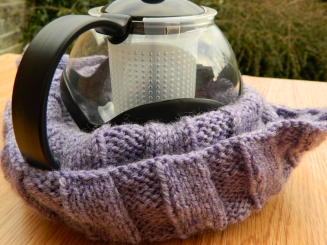
This, despite how it might appear, is a very basic, easy to make cozy. I guessed the size I needed, and (using what I *think* is double knit, and number 8 [old English] needles) cast on 100 stitches. This made it a lot easier to divide it up for hole placement, for example. It consists of a single rectangle of a 1×1 rib at the bottom, and the rest is a 5×5 rib.

Its finished shape reminds me of the dried poppy seed heads I used to see near my home at the end of summer.

Purple poppy seed head tea cozy.

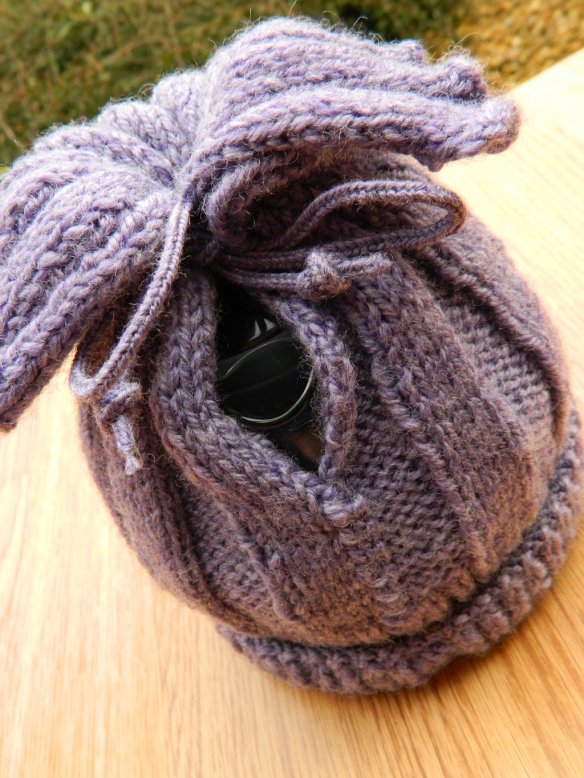
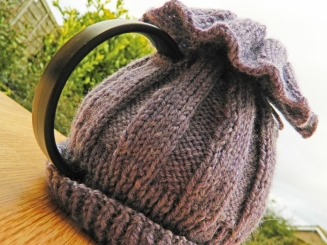
There are two holes for the handle, simple cast off on one row, and casting the lost stitches back on in the next, as you would for a button hole. You can do this this way because unlike most teapots this Bodum one has a separate glass “bowl” that you can unclip from the plastic “holder” section – you take it off and thread the handle through the holes before popping the glass section back in.

Purple poppy seed head tea cozy.


Purple poppy seed head tea cozy.

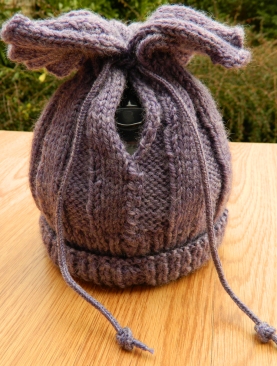
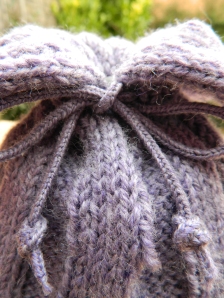
And then the drawstring goes through a row of single stitch button holes, one in the middle of each of the 5×5 rib sections. It is sewn up the front just enough to part for the spout.


Purple poppy seed head tea cozy.

It opens right up and scrunches down so you can fill it, and then you just pull it back up, and tie the drawstring again. You don’t have to worry about it dropping off en route to the table, and you don’t have to lift it off to pour.

The cord is lucet braided, but you could just as easily use a single chain of crochet, or contrasting colour cord instead if you don’t have a lucet.

Purple poppy seed head tea cozy.


I’m quite happy with how it turned out, given that I completely winged the entire thing, just holding it up against it every now and again, and trying to imagine how it would look once it was sewn up and wrapped around. I haven’t seen one like it, anyway, and I do like to be individual. 🙂


Purple poppy seed head tea cozy.

Funky Card Holder

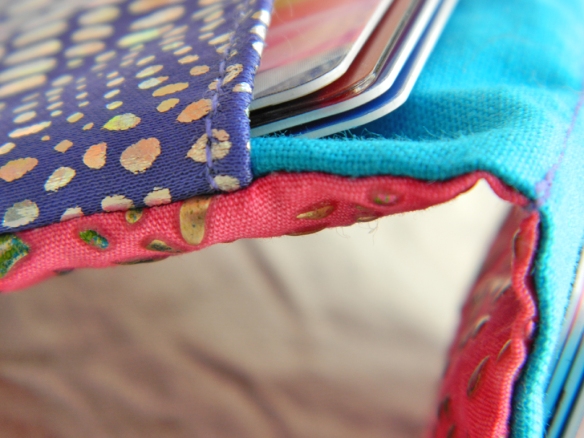
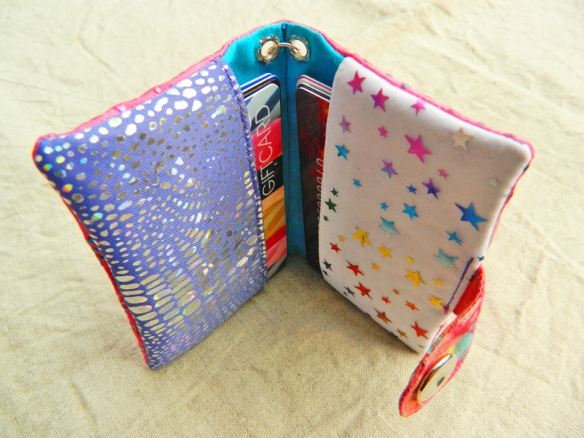
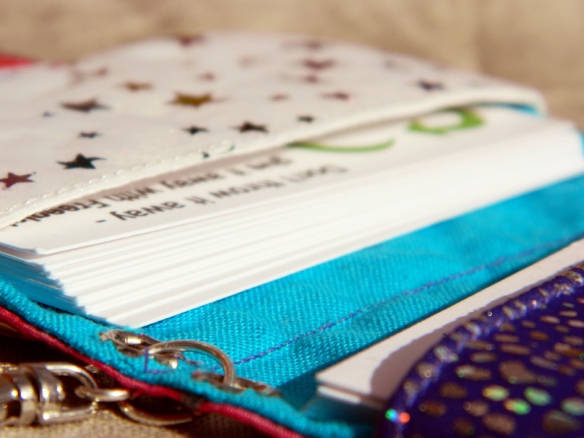
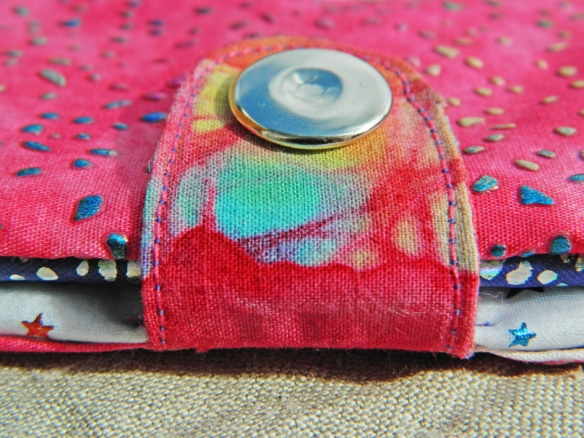
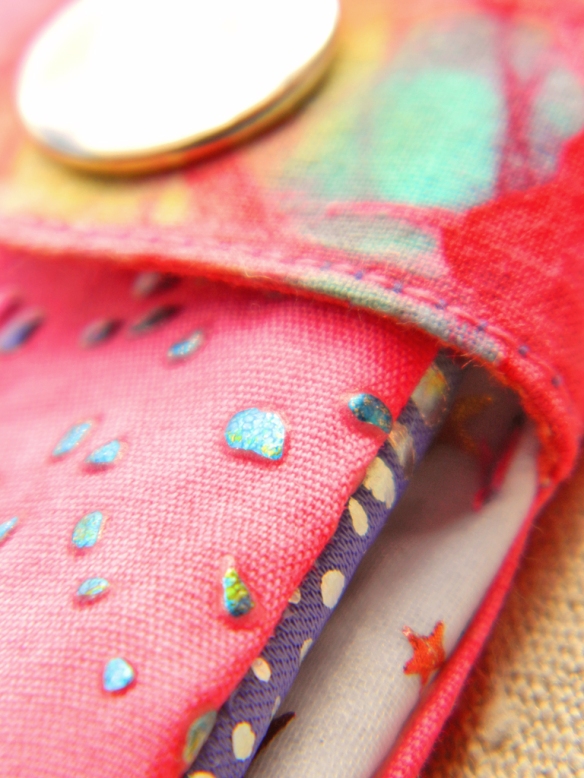
1card holder Resized
33 card holder Resized
32 card holder Resized
40 card holder Resized

Today’s entry is a card holder loosely based on this one: http://schlosserdesigns.blogspot.co.uk/2009/02/tutorial-tuesday-business-card-holder.html

I knew I wanted to make one as soon as I saw it, but I wanted to give it the Snotty Dog twist, so taking purely the twin pocket idea, I set about making my own with that little added extra “something”.

It is large enough to take store cards or even credit cards if you don’t have any business cards to fill it.

And the clip means you can attach it to the end of the zipper on an inside pocket of your bag so it doesn’t drift about in the bottom evading capture when you’re standing at the till, or trying to get your business card to someone who needs to dash off.

You will need:

A very small amount of fabric(s) of your choice, scraps even, or a fat quarter.

Coordinating thread(s)

2 small rivets. Even card making ones should be fine if that’s what you have.

Rivet setting tool (you usually get a basic one to use with a hammer in the pack)

1 snap fastener or press stud

1 small swivel clip

2 jump rings, one larger than the other to attach the clip. Or you could use a single smallish split ring- the type of thing you have your keys on.  (I made my jump rings as I have jewellery pliers and wire, and it only takes a minute.)

Instructions:

First I checked the measurements and it turns out that the cards I’m making this for are (roughly) 3.5 x 2 inches.

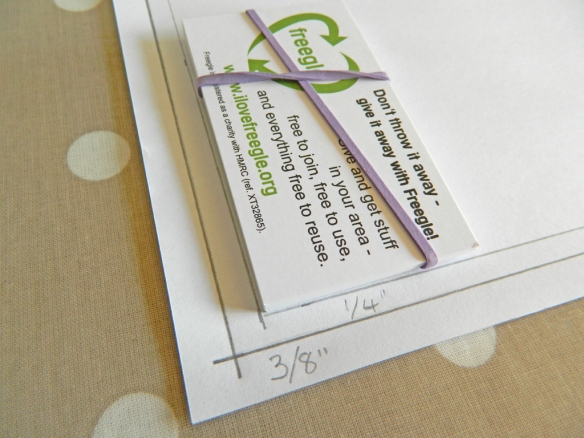
I then decided I needed 3/8” for seam allowance, and ¼” for “ease” so that the cards aren’t rammed inside, and you have enough room to get one out easily, even if you have a fair sized stack in there. Plus then another inch in between the cards where the fabric folds over. This will allow room for your clip later.
card holder Instructions
card holder Instructions 2R
This is what the pattern should look like (I forgot to write on 3 1/2″ up the side as I was making this all up as I went along and took the pic before I realised), just note that that is inside (extra to) the 1/4″ and 3/8″ measurements:card holder Instructions 3R

And this is the pattern for the pocket pieces – note that the measurements include all the seam allowance all the way around but only on the pocket pattern.  It would have been overly complicated to draw them in, and it’s easy enough to remember that ALL the seam allowances are 3/8″ on this project:card holder Instructions 4R

I went through my fabric stash and found these which I thought went together well (or clash so badly your eyes are now bleeding, it depends on your taste!). 😉 At this point I hadn’t fully made my mind up what the interior fabric would be, so I went looking in my stash and came up with a rather fetching turquoise that goes clashes particularly well. 😀card holder Instructions 5R

As the purple one has a significant one way stretch and was rather floppy, I stuck on some scrap interfacing from my stash. You may now be kicking yourself that you threw those bits away that you thought would be no use for anything. I am in no way encouraging hoarding – I am in fact helping, yes, “helping” you to bust your stash. Okay, I know this won’t bust your stash unless you make one for everyone you’ve ever known, loved, met, worked around and made eye contact with, but hey, it all helps.

You don’t need to have the interfacing all the way to the edge of the seam allowance, just enough to cover the rear of the main part that will be showing. As you can see, I wasn’t in any way precise:
card holder Instructions 6R

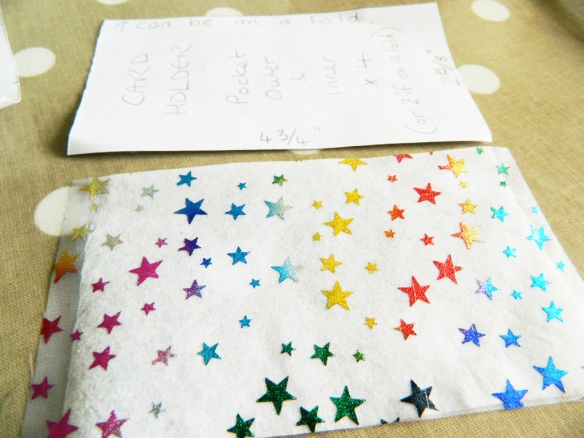
I did the same with the star fabric as it’s a chiffon/tuille see-through type fabric and thin and floppy as hell, so it needed a bit of propping up. Again there’s no need to add bulk to your seams – though the truth is, the scrap of interfacing just happened to be this wide, so I took advantage:
card holder Instructions 7R

Now cut out your outer and inner main fabric pieces:
card holder Instructions 9R

I used the selvedge here because as we are turning this inside out, I wanted an edge that was a bit more robust, and it’s a good way of making best use of fabric! Just be sure that the undyed/holes part is within the seam allowance. I had to trim about 5mm off, but it’s still sturdy without it:
card holder Instructions 10R

Also cut out two “lining” pieces from some plain scrap to use for the inside of the pockets. Here are all the pieces laid out:
card holder Instructions 11R

Okay, now take one of your “pocket outers” and one of your “pocket inners” in turn, and with right sides together, sew down one long side only. Remember all the seams are 3/8ths of an inch, and you don’t have to back stitch if you don’t want, as the ends will be enclosed in the next step.

Now – and remembering to use matching thread, unlike on my first attempt that I had to undo – turn them right sides out, and top stitch about 1/8th in from the edge you have just sewn, so you enclose the last row of sewing you did, and flatten what will be the top edge of your pockets. It will look neater if you sew it liner side up, and pull the liner over just a little more, so that it will be hidden when the holder is finished:
card holder Instructions 12R

Now you need to find either something you can draw around, that is roughly 1 ½” across, or use a compass, and draw yourself a “U” shape that is roughly 2 ½” long x 1 ½” wide out of either a contrasting fabric, as here, or the same as your outer fabric. Cut out two of these. (Pic A)

With those U-shapes right sides together use the edge as your guide for the 3/8” seam allowance, and sew around the U, leaving the straight edge open. Take your time or you’ll have a wonky tab. Trim with pinking shears if you have them, or just down to about 1/8 to ¼” if you don’t. (Pic B)

Turn the right way out, I used my bone folder, it was just the right size, and press if you need to to get a good edge. Don’t push on your seams too hard or you may bust through them. (Pic C)  Don’t ask me how I know this.

Top stitch in a matching (or contrasting) thread, no need to back stitch, you will be enclosing the end. (Pic D):
card holder Instructions 13-16

The next step is locating your press stud “back” on your outer fabric. It will be located at the opposite end to the one with the opening for turning the thing right sides out (so in my case it’s at the opposite end from the selvedge). And you want it to be central along the edge.

So fold under your seam allowance, and using a ruler to find the middle, and holding your “tab” that you just made slightly under the edge as if it were sewn on the other side of the holder, lower it down and (you have to guesstimate) put a pencil mark where you want it to go. Don’t worry if you only have a biro, it will be covered up by the metal stud. I put an arrow so you can see mine as it’s hard to make out with all the other dots. You don’t want to be pulling the tab hard around to get it to shut, so leave enough ease that it will just sit right. Basically, don’t put it too far in, and don’t put it too close to the edge. You will get to fine tune where your tab gets sewn later, so don’t worry too much whether it’s in the right place or not, just go with your gut:
card holder Instructions 17R

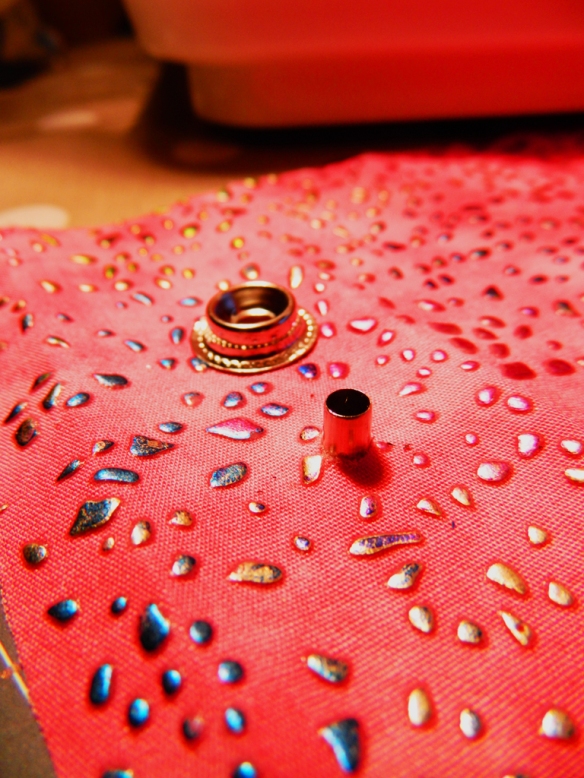
Make a hole where your pencil mark is just through the one (outer) layer of fabric. The stud (if you’re using this type) comes in four parts. When you have them in front of you you will see there are two parts to the bottom, and two for the top. Get the back of the bottom part, and put it through the hole:
card holder Instructions 18R

Now put the front on, and crimp with your tool, or bash the crap out of your mini tool with a hammer, (the one that came in the pack.) The next bit is for those of you who think the show “You’ve Been Framed” is full of “instructional” videos –

Don’t do this on a glass table. I don’t want emails from people saying I made you smash up their furniture. And if you do do it on your best wooden table, put something underneath so you don’t damage your french polish. A chopping board would work, but get that okay’d with the chef of the house first.

Make sure you hold the tool in place firmly, and don’t do what I did, which was to lose grip and let the tool jump to one side, causing the snap part to bend, rendering it useless until you bend it back with pliers while swearing under your breath:
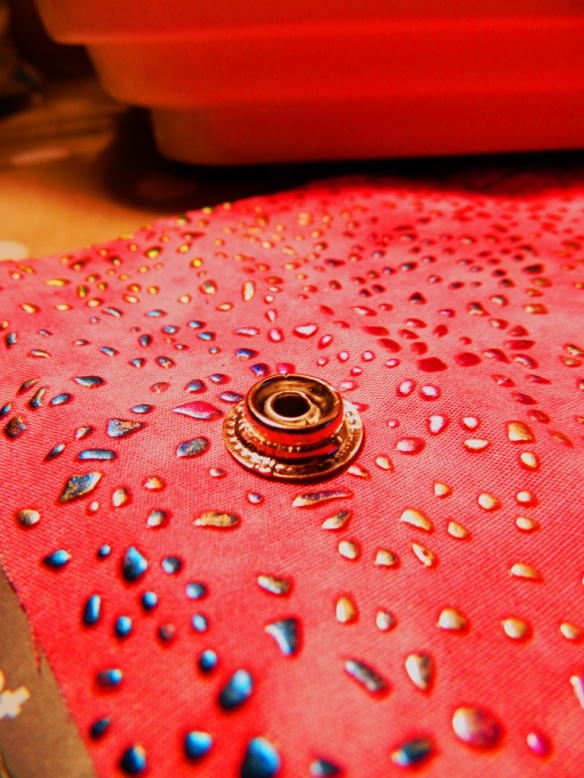
card holder Instructions 19R

Now you basically do the same type of thing with the tab, only this time, don’t do what I did and use a rivet setting tool to set the top of your stud – unless you want a dimple in it:
card holder Instructions 20-24

Fortunately I like dimples, though usually I prefer them on faces, and not in places where there should be a nice smooth chrome dome shape, but you live and learn and these days I just count myself lucky that I still have all my fingers, but that’s largely down to self-taught DIY and mechanics mixed with a neurological disorder that fries the old brain cells, gives you the shakes and 24/7 dizziness, rather than any built in stupidity. Honest. Some days it works better to aim for the nail, and sometimes to aim for the thumb, the fun lies in guessing what type of day it is.

Okay, now back to the larger pieces. Make sure you’ve marked on where your opening is. You want to start at the bottom mark, and sew (with 3/8” seam allowance) around to the top mark, leaving a reasonable sized gap to turn it the right way out:
card holder Instructions 25
Lay your pieces out in this order, ‘pocket & inner fabric right sides’ facing ‘outer right side’, and press stud on the opposite end to your opening:
card holder Instructions 25a

Snip off your corners at a greater angle than 180, as shown here, as it allows the seam allowance to sit flat when you turn it out:
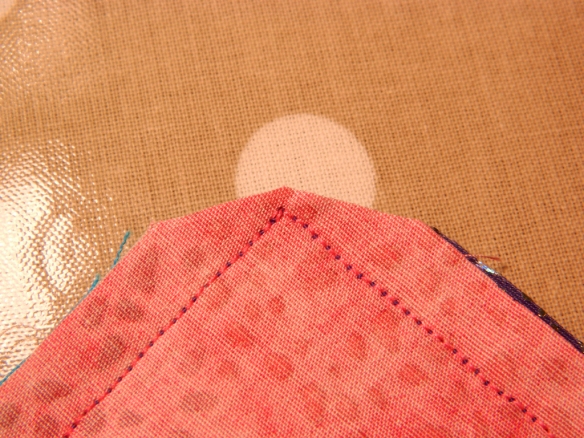
card holder Instructions 26

Pinking shear (or trim down) three sides to reduce bulk. Leave the opening end alone as it’s easier to sew later:
card holder Instructions 27

Turn the whole thing the right way out, making sure to put the pockets on the inside with the outside of them showing, like this:
card holder Instructions 28

Place your tab in the opening – making sure it’s the right way up – and sew the tab and the opening closed, as close to the edge as you can. You might want to remember to use the right coloured threads top and bottom, unlike me, the numpty who forgot. Not that it looks that bad, and it is on the inside after all:
card holder Instructions 29

Fold the whole thing down the middle, and mark the crease enough to sew a line along it. Then on one end, it doesn’t matter which, stamp out your “pilot” holes, and insert and set your rivets, with the top on the outer of the fabrics:
card holder Instructions 30

Now add the larger of the jump rings through the rivets, and attach the clip to this with the smaller one:
card holder Instructions 31

And you’re done!
36 card holder Resized (123)
37 card holder Resized (118)
34 card holder Resized (95)
39 card holder Resized (99)
38 card holder Resized (90)
35 card holder Resized

Do check out www.ilovefreegle.org if you are in the UK.

Creative Commons Licence
Funky Card Holder by Louise @ Snotty Dog is licensed under a Creative Commons Attribution-NonCommercial-ShareAlike 3.0 Unported License.
In other words, you can make these for yourself and your friends and family with my blessing, but you cannot use my work to sell them to make a profit, nor can you take my instructions and sell them as they are freely available here.  Do click through the link for more details, ta.